Search This Blog

Sunday, December 4, 2011

Tailoring: Shaping your shoulders.


The Shape of your jacket is important to making a good looking blazer. Like the collar, the shoulder structure of your jacket is an important component to make your jacket fit well and look sharp and professional. There are multiple components to add in your jacket shoulders to achieve the smooth structure.
1.       Shoulder pads
a.       Shoulder pads may be associated with the 80’s, but they are still well used and needed to shape your jacket shoulders. You may buy shoulder pads from the store, or you can make your own from pellon and fleece.
b.      Shoulder pads should be large enough to cover your shoulder without intruding into the neckline.
c.       Shoulder pads should be the correct thickness to fill in the hollow parts of a shoulder and for the style of jacket.


2.       Sleeve heads
a.       Sleeve heads aid shoulder pads in filling in the hollow parts that fall off the shoulder into the arm. They also prevent the seam allowance from showing through to the outside. Sleeve heads are easy to make but can be purchased as well.
b.      Sleeve heads are sewn into the seam allowances so that the fold into the sleeve.


3.       Further shaping
a.       Depending on the weight of your fabric, stays on the front and/or back may also be needed to fill out the hollow spaces.
b.      For front and back stays, use your pattern to cut a section that matches the shape of your shoulders from a light weight muslin, pin and stitch to shoulder seams.

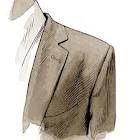
Tailoring: Notched Collars

A Notched collar is the traditional collar seen on a tailored blazer. When shaped well, a notched collar is sharp, professional, and well fitted improving the quality of the look of your jacket.
1.       Start with your under collar.
a.       Make sure all your seams and your roll line is marked.
b.      Interface the under collar with a fusible interfacing. Keep interfacing out of the seam allowances to reduce bulk.
c.       Sew the center seam, stabilizing the edges and press open.
d.      Stitch on the roll line. Then stitch parallel every ¼” inch from the roll line to the curved edge.
e.      Folding right sides together on the roll line and press on a pressing ham to shape and make the collar stand on its own.
f.        Line up the straight edge of the upper collar and under collar and stitch from the corner on the rounded side, to the other side of the collar. Stay-stitch the edge.
g.       Miter the corners. Be careful not to cut too far so you don’t get frayed rabbit ears.
h.      Grade and clip the straight edge seam then turn the collar right side out.
i.         Press the collar. Make the seams and corner as flat as possible.
2.       Attach the Collar to the jacket.
a.       Right sides together, sew the under collar to the jacket starting at the back center front out. The end of the collar should match to the point where the lapel is sewn together.
b.      Right sides together sew the facing to the upper collar. Grade, clip and notch the seams between the facing and the neckline to remove any bulk.
c.       Stitch these seams together.
d.      Press and fold on roll line. Steam but DO NOT press roll line.

Tailoring: Sequence of construction for your tailored jacket

When sewing something as intricate and structured as a Tailored Blazer, the order must be given some attention. The fit of your jacket is affected by each component and adjust and move slightly as the construction of your jacket progresses. Here is the order in which the construction of my jacket has been done in to allow for a step by step map.
1.       Layout and cut your jacket pieces. (Find the best way to lay them out to save fabric and make sure they are all on grain!)
2.       Mark your fabric with an appropriate marking tool. (Make sure the markings will be able to washout without leaving an oil mark!)
a.       Mark notches
b.      Mark grain lines and center front
c.       Mark dots
d.      mark darts, pleats, gathers, and vents
e.      Mark seam allowances
f.        Mark any other tool on your pattern to help align your garment pieces
3.       Interface where necessary. (Research the appropriate interfacing. I recommend using fusible where possible!)
4.       Sew all darts and princess seams. (After sewing any seams make sure you press appropriately)
5.       Apply any pockets and bound buttonholes. (Make a sample first!)
6.       Sew in seam tape.
7.       Sew in front facings. (Pay attention to how to make your front edge seams roll under so they aren’t visible in the finished product!)
8.       Sew in shoulder seams and side seams. (First fitting: asses and adjustments needed.)
9.       Sew and shape the under collar. (Pay attention to your roll line!)
10.   Sew the under and upper collar together. (Trim, press, and shape: make sure the seams and corners aren’t bulky!)
11.   Apply the collar to the jacket. (Baste and check how it shapes before permanently stitching!)
12.   Sew together if have two piece sleeves and baste in. (Second fitting: Make sure the collar lies against the neck properly and the sleeves hang straight.) Permanently sew in sleeves.
13.   Sew in Shoulder pads and sleeve heads.
14.   Finish your bound buttonhole or sew in machine buttonholes.
15.   Finish hem and vents.
16.   Sew on buttons or snaps.
17.   Steam your garment. (Make your garment shell look as if you were going to wear it without lining! It’s easier to steam and press without your lining in.)
18.   Make sure your lining pattern includes pleats and other fitting ease. Layout and Cut lining. (Be careful with slippery fabrics they like to move when you cut!)
19.   Sew up your lining seams.
20.   Hand sew in your lining.

Tailoring: Before you Sew!


Before you begin constructing your garments, it is important to preshrink your fabric. Fabrics come from the store with temporary finishes and haven’t been dried, and the last thing you want is to happen is for you to finish constructing a beautiful garment and for it to shrink in the first wash. Trust me. Don’t you hate when you buy a new shirt and you love the fit then it shrinks after you wash it? Save yourself some unneeded frustration and preshrink your fabric!
Fusible interfacing: Immerse into hot water and let it soak until the water is cool. Roll up in a towel to remove excess water and let hang over a towel bar or shower rod to dry. (NOTE: this is the only fabric you can hang dry. Others will stretch and become off grain.)
Hair Canvas: Spray hair canvas with a spray bottle and press dry.
Cottons and linens: Immerse in hot water then dry in your dryer. Press wrinkles if needed.
Wool: Immerse into warm water and squeeze out the excess. Lay out wool into a dry bed sheet and fold it up together. Allow to sit in a plastic bag for 24 hours. Then lay out wool on a flat surface to dry. Press out wrinkles if needed.
Zippers, edge tape and other accessories: Immerse into hot water and let soak until the water has cooled. Allow to air dry then press.
Save yourself the time and preshrink before you sew! Do your research and test a piece of your fabric to see how much it will shrink. Put in that much more work and give yourself a good fitting garment that will last past the first wash!

Friday, December 2, 2011

Tailoring: Covered Snap


Snaps are an easy, convenient closure for many garments, such as jackets and the under lap of a trouser waistband, in replace of buttons and buttonholes or hooks and eyes. However, snaps are not always the most professional, attractive, or matched style of closure. Covering your snaps with fabric is an easy fix to allow you to use snaps for their convenience and match them to your garment.


1)      Cut two circles out of a light weight fabric that matches your garment slightly larger than the diameter of your snap. If your wool, cotton or other type of fabric is light enough that two layers can fit between the snaps, feel free to use your fashion fabric. However, if your snap wont fully snap use a lighter weight lining fabric that matches.
2)      Make a small running stitch around the edge. This is just a traditional single thread stitch used to hand baste. Make a knot in one end of the string so you can’t pull it out.


3)      Place the inner side of the snap in the circle face down. Pull the lose end of the basting so that the fabric is drawn around the snap. Secure the threads with small stitches.
4)      For the other circle, sew a running stitch around the edge as well and draw it around the snap. With a needle or pin, spread apart the yarns to create a hole for the outer part of the snap to poke through. This will allow the snap to fit together.
5)      Test your snaps.
6)      Attach the snap with the outer ball to the overlap in its proper location. Using a buttonhole stitch make several stitches through the holes of the snaps. Use a double thread to secure your snap to your garment. Match where the inner half of the snap will be on the under lap. Stitch this side of the snap from the fabric under the snap hiding the stitching.
Your stylish snaps are now complete!